Photography Tips for Kaudulla Safari: Capture Elephants and Wildlife Like a Pro

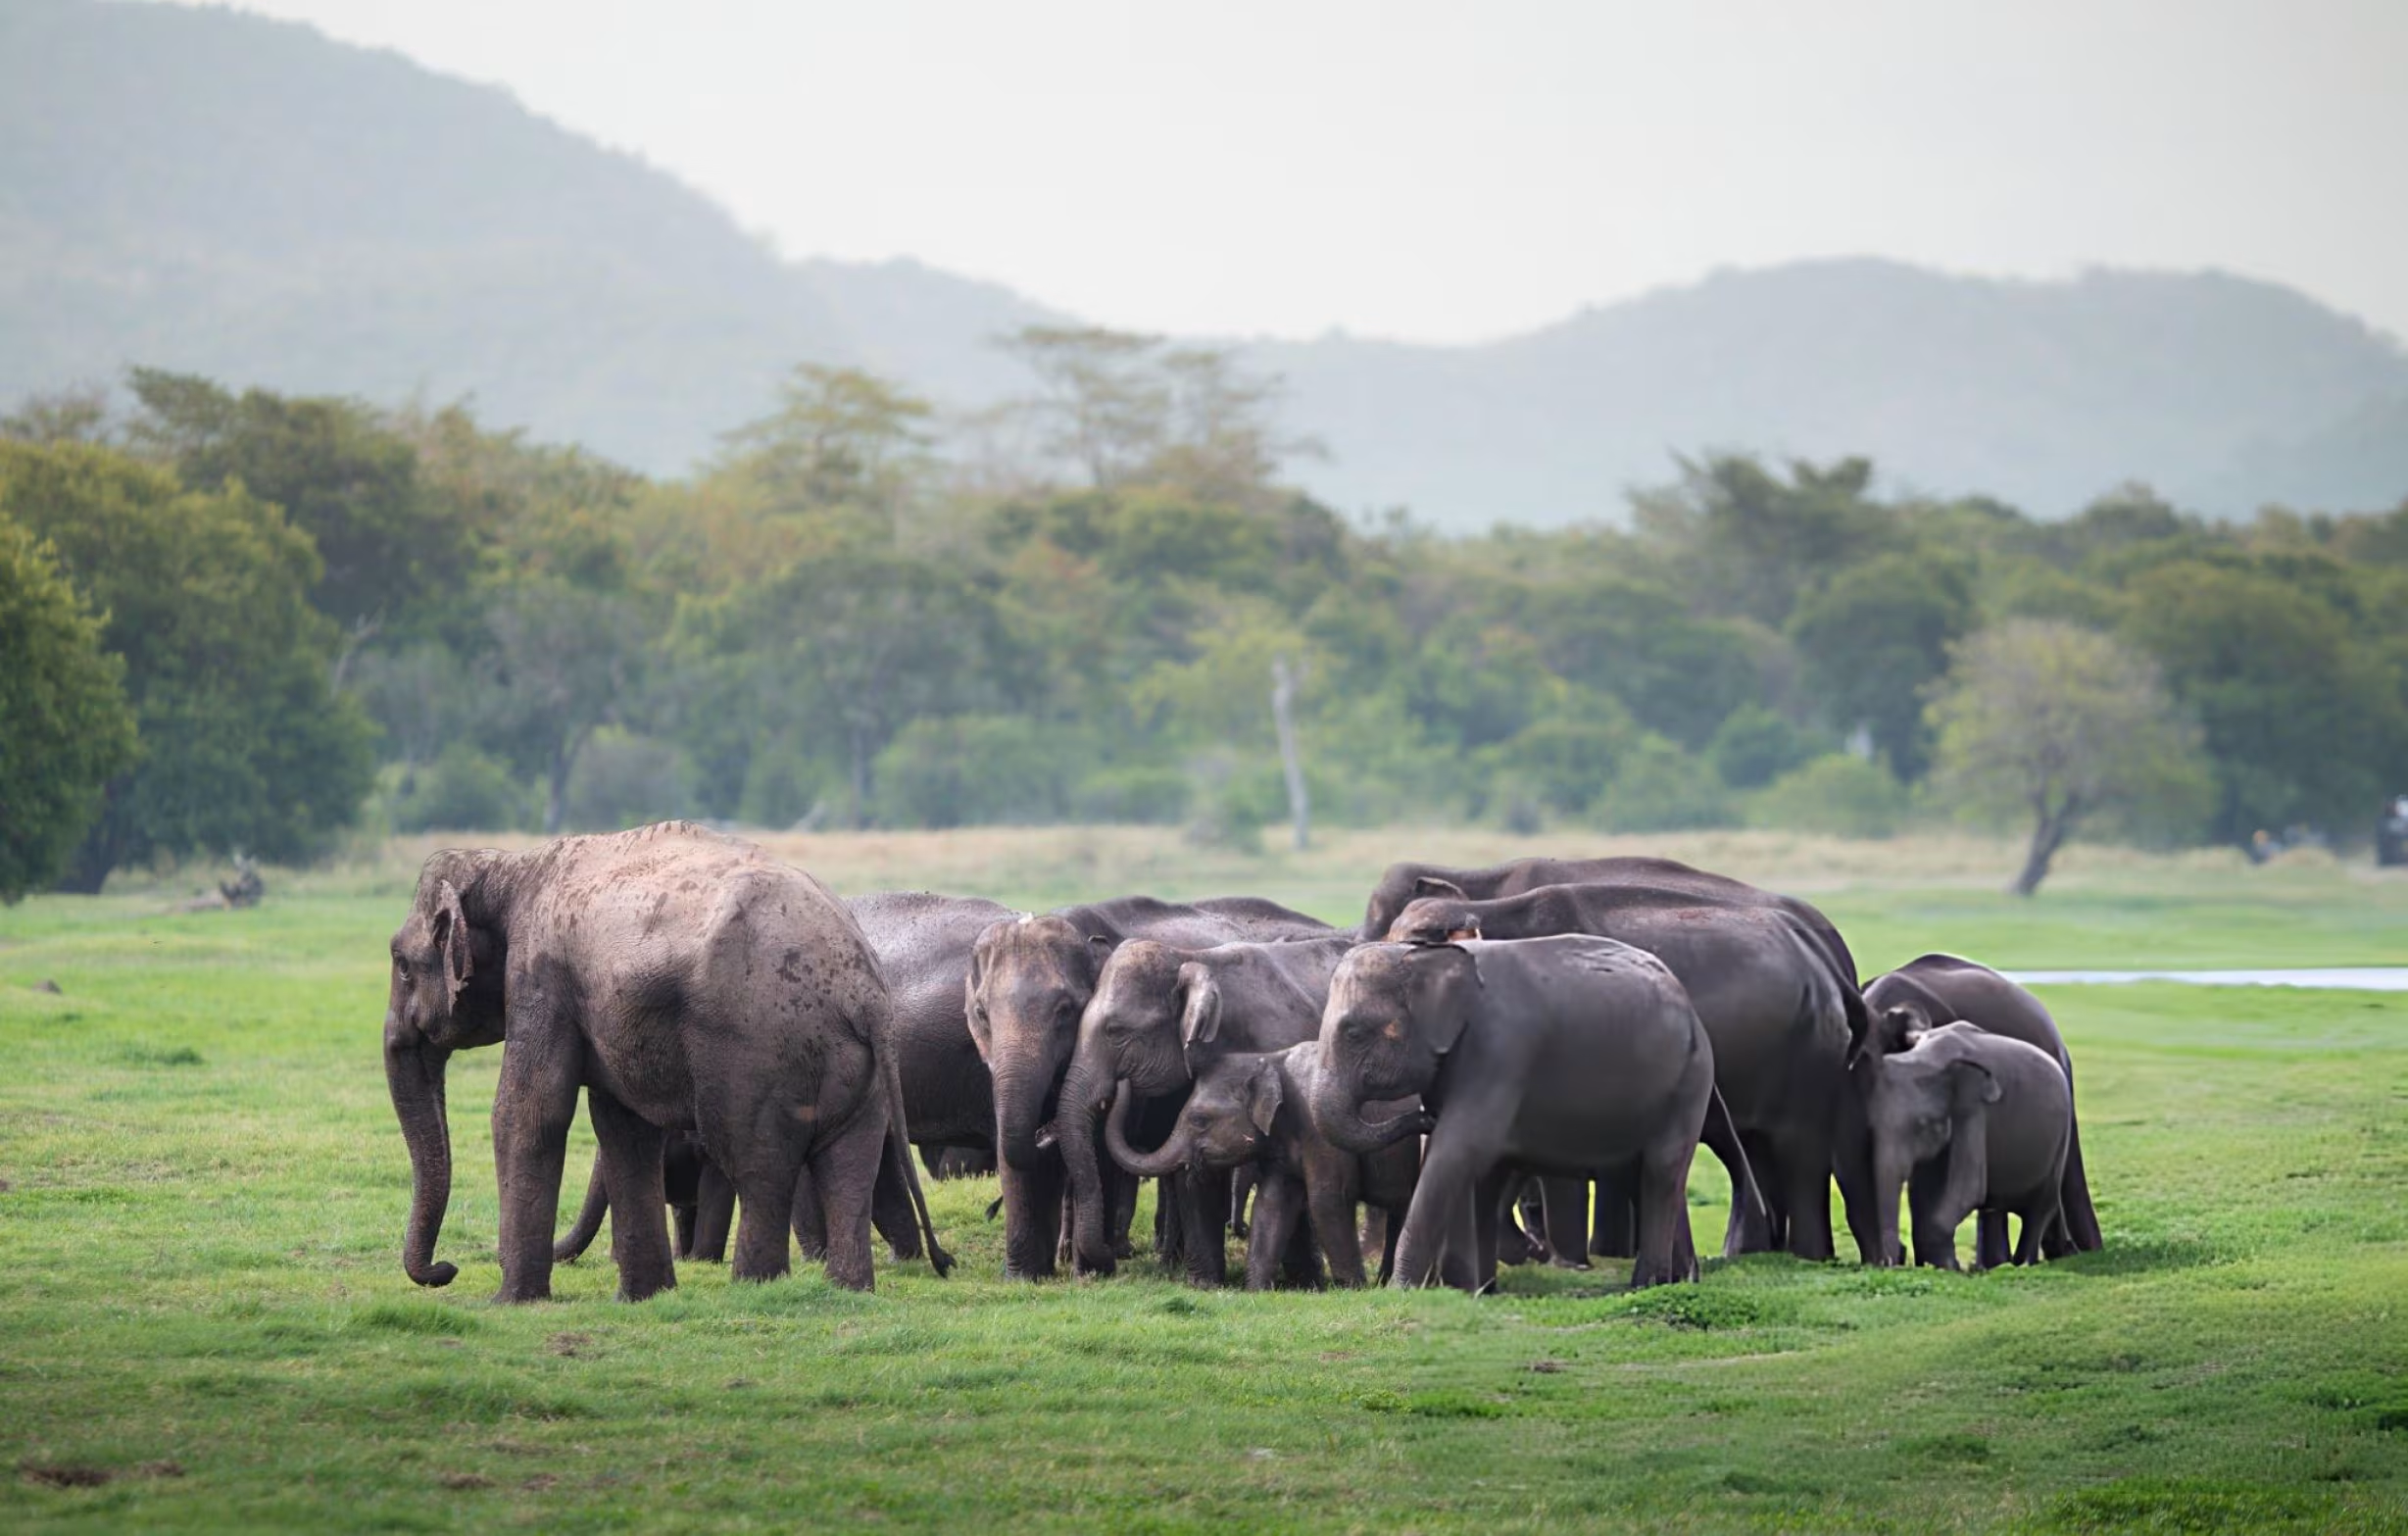
Kaudulla National Park ranks among the world's premier destinations for wildlife photography, offering extraordinary opportunities to capture Asian elephants in spectacular gatherings numbering hundreds of individuals, diverse birdlife including colorful kingfishers and massive painted stork colonies, and dramatic landscapes where ancient reservoirs meet golden grasslands under vast tropical skies. The park's relatively open terrain provides excellent visibility and clear sightlines to wildlife, while designated safari routes bring photographers within ethical yet intimate distances of elephants, deer, water buffalo, and countless other species. However, consistently capturing professional-quality wildlife images requires far more than simply pointing a camera at animals—it demands understanding of camera settings optimized for rapidly changing conditions, lens selection balancing reach and image quality, composition techniques that transform ordinary animal snapshots into compelling visual stories, lighting strategies that leverage the dramatic quality of tropical dawn and dusk, and most critically, ethical practices ensuring your photography never disturbs or endangers the wildlife you've come to document. Whether you're a serious photographer with professional equipment seeking portfolio-worthy images, an enthusiastic amateur wanting to significantly improve your wildlife photography skills, or simply hoping to return from your Kaudulla safari with stunning photographs that do justice to the magnificent creatures you'll encounter, this comprehensive guide provides the technical knowledge, practical techniques, and ethical framework needed to capture extraordinary wildlife images while respecting the animals and environment that make this destination so special.
Understanding Kaudulla's Unique Photography Environment
Before diving into specific camera settings and techniques, understanding Kaudulla's distinctive photographic challenges and opportunities helps you prepare equipment and approaches optimized for this particular environment rather than applying generic wildlife photography advice that may not translate effectively.
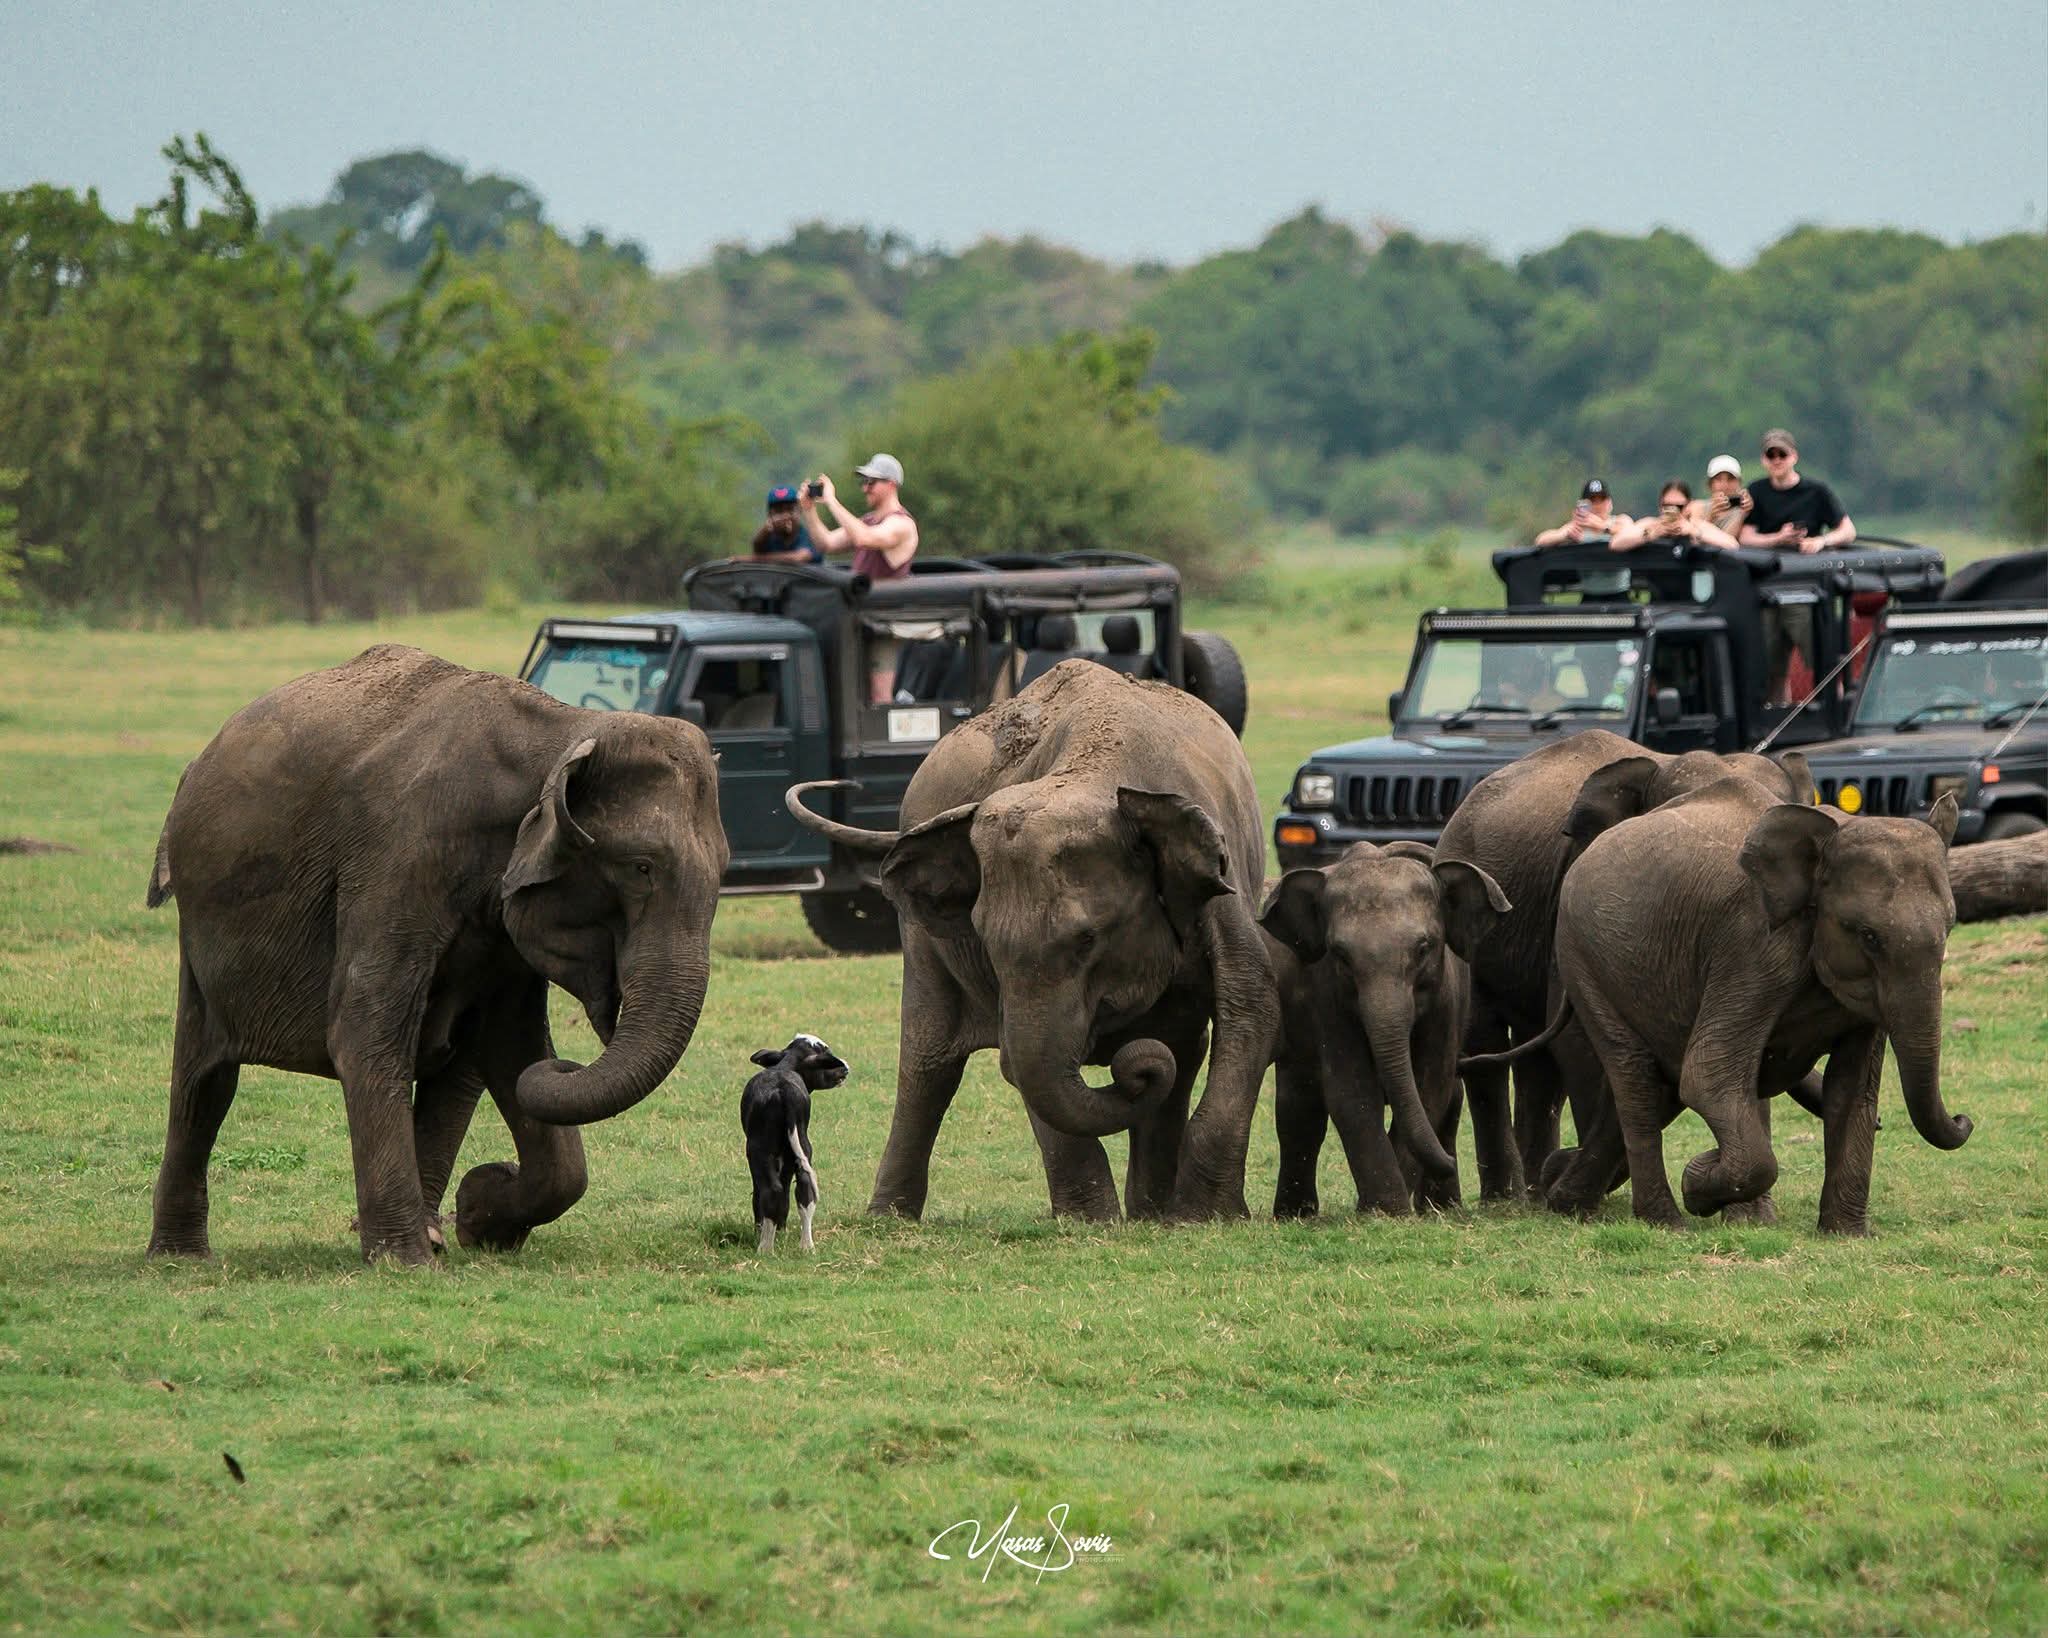
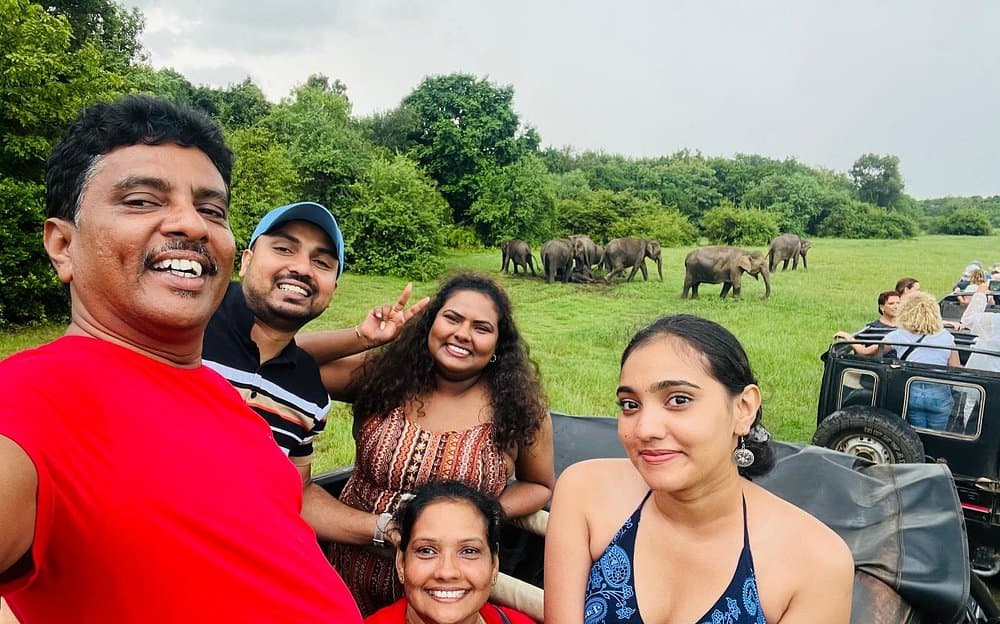
Safari vehicle constraints fundamentally shape your photography approach at Kaudulla. Unlike some African parks allowing photographic hides or walking safaris where you can set up tripods and wait patiently for perfect moments, Kaudulla photography occurs almost entirely from open safari jeeps that constantly move, vibrate, and shift position. This mobility provides advantages—covering large areas, repositioning for better angles, following moving wildlife—but creates challenges including camera shake from vehicle movement, inability to use tripods effectively, limited control over shooting positions and angles, and sometimes awkward vehicle heights or angles relative to subjects.
Distance to wildlife varies considerably depending on species, time of year, and luck. During peak elephant gathering season (July-September), you'll frequently find yourself 10-30 meters from massive elephant herds—close enough for stunning full-frame portraits yet requiring vigilance about respecting safe distances. More elusive species like leopards typically appear at 50-100+ meters if spotted at all, demanding longer telephoto reach and potentially lower image quality from distance and intervening vegetation. Birds range from tiny distant specks requiring maximum magnification to bold kingfishers perching on exposed branches just 20-30 meters away offering perfect portrait opportunities.
Lighting conditions change dramatically throughout safari durations, requiring constant adjustment of camera settings and shooting approaches. Early morning safaris begin in soft, low-angled light with beautiful warm tones but challenging low light levels demanding higher ISOs or wider apertures. As the sun rises, light intensity increases rapidly creating harsher, more contrasty conditions by 9:00-10:00 AM. Afternoon safaris start in harsh overhead light before transitioning into the coveted golden hour (approximately 5:00-6:00 PM) when warm, directional light paints everything in gorgeous tones perfect for dramatic wildlife portraits.
Dust and environmental challenges particularly during dry season require constant equipment vigilance. Fine dust coats everything including lens front elements degrading image quality through reduced contrast and sharpness, infiltrates camera bodies during lens changes potentially damaging sensors, and creates atmospheric haze reducing visibility and color saturation in distant subjects. Managing dust through protective measures and frequent cleaning becomes essential for maintaining image quality throughout multi-hour safaris.

Essential Camera Equipment for Kaudulla Wildlife Photography
While smartphones produce adequate casual safari snapshots, serious wildlife photography demands dedicated camera equipment providing the image quality, manual control, and telephoto reach necessary for consistently capturing compelling images.
Camera Body Selection
DSLR or mirrorless cameras represent the standard tools for wildlife photography, offering interchangeable lenses, full manual control over all exposure parameters, fast autofocus systems tracking moving subjects, and high-quality sensors capturing maximum detail and color. While professional full-frame cameras deliver ultimate image quality, intermediate crop-sensor (APS-C) cameras produce excellent results at lower cost and weight, with the crop factor actually providing benefits by increasing effective focal length of telephoto lenses (a 300mm lens on crop sensor provides equivalent framing to 450mm on full-frame).
Key camera specifications impacting wildlife photography success include autofocus performance—number and positioning of focus points, ability to track moving subjects, and speed of focus acquisition particularly in lower light conditions. Modern mirrorless cameras generally outperform DSLRs in autofocus capabilities, though high-end DSLRs remain highly capable. Burst shooting speed (frames per second) determines your ability to capture wildlife action—faster burst rates (8+ fps minimum, ideally 10-20 fps) provide more frames during behavioral sequences increasing odds of capturing peak action moments with perfect positioning and expressions.
ISO performance affects your ability to maintain fast shutter speeds in challenging lighting conditions. Better high-ISO performance (low noise at ISO 3200-6400) allows shooting in early morning or late evening low light without excessive image degradation. Weather sealing provides valuable dust and moisture protection in safari environments, though doesn't eliminate need for careful equipment handling and cleaning.
Lens Selection and Strategy
Telephoto zoom lenses form the backbone of safari photography equipment, providing versatility to frame both environmental shots showing habitat context and tight portraits emphasizing subject detail without needing constant lens changes in dusty conditions. The ideal focal length range depends on your specific goals and budget:
70-200mm f/2.8 or f/4 lenses provide excellent quality and versatility for closer wildlife encounters, large elephant gatherings where you want to show multiple animals in frame, and environmental portraits including significant habitat. However, maximum 200mm reach proves limiting for distant subjects, small birds, or situations where you cannot approach closely. These lenses work well as secondary optics complementing longer telephotos.
100-400mm f/4.5-5.6 or 150-600mm f/5-6.3 lenses deliver the reach needed for most Kaudulla photography situations, allowing tight framing of distant elephants, bird portraits, and flexibility for various wildlife encounters. The zoom range provides compositional versatility without lens changes. These lenses represent optimal choices for photographers bringing single lens to safari—the versatility and reach handle vast majority of photographic opportunities you'll encounter.
Prime telephoto lenses like 300mm f/2.8, 400mm f/2.8, or 500mm f/4 deliver ultimate image quality with wider maximum apertures enabling faster shutter speeds and better low-light performance. However, their fixed focal lengths reduce compositional flexibility, massive size and weight create practical challenges, and astronomical costs ($6,000-15,000+ USD) place them beyond most photographers' budgets. Unless you're serious wildlife photography professional, versatile zoom lenses prove more practical for safari contexts.
Wide-angle lenses (24-70mm range) complement telephoto optics for landscape shots showing Kaudulla's dramatic scenery, environmental portraits placing wildlife in habitat context, and potentially group shots of your safari companions. While less critical than telephoto reach, having wide-angle capability adds creative options. Some photographers carry wide-angle zoom in addition to telephoto, while others accept that some creative opportunities will be missed in favor of luggage simplicity.
Lens image stabilization (IS, VR, VC, OS depending on manufacturer) proves absolutely critical for safari photography from moving, vibrating vehicles and hand-held shooting without tripod support. Stabilization allows using slower shutter speeds than otherwise possible without blur from camera shake—potentially 2-4 stops of advantage meaning you can shoot at 1/125 second with stabilization where 1/500 second might be required without it. When choosing between two otherwise comparable lenses, always prioritize the one with better stabilization.

Essential Camera Accessories
Spare batteries (minimum 3-4 fully charged) ensure you never miss photographic opportunities due to power exhaustion. Safari photography with continuous shooting, image review, and electronic viewfinder use drains batteries remarkably quickly, while tropical heat can reduce battery capacity. Store spare batteries in accessible pockets allowing quick changes when power runs low.
Multiple memory cards (64GB+ capacity each) prevent running out of storage mid-safari while also providing risk mitigation if cards fail or become corrupted. Use fast cards (UHS-II or faster) enabling camera buffer to clear quickly during burst shooting—nothing is more frustrating than missing critical action because your camera buffer filled and cannot shoot more images until slow card finishes writing.
Lens cleaning kit including microfiber cloths, lens cleaning solution, and blower brush becomes essential equipment for maintaining image quality as dust inevitably coats front lens elements. Clean lenses frequently during breaks in wildlife viewing—dust particles scatter light creating hazy, low-contrast images that significantly reduce quality.
UV or clear protective filters on lens front elements provide inexpensive insurance against damage from impacts, scratches, or dust. Quality filters create negligible image quality reduction while protecting expensive lenses. Budget an extra $50-150 USD per lens for good-quality protective filters.
Camera rain covers protect equipment during unexpected showers in monsoon season, though Kaudulla's open terrain means most rain passes quickly. Simple plastic bags provide emergency protection if you lack proper covers.
Bean bag or window mount stabilizes cameras when shooting from safari vehicle windows or over door frames. While not essential, these supports significantly reduce camera shake compared to hand-holding, enabling slower shutter speeds and sharper images. Small bean bags compress easily in luggage and prove more practical than rigid tripod heads for vehicle-based shooting.
Optimal Camera Settings for Kaudulla Wildlife
Understanding camera settings appropriate for different safari conditions and subjects ensures you're technically prepared to capture sharp, well-exposed images regardless of lighting or wildlife behavior.
Exposure Mode Selection
Aperture priority mode (A or Av on mode dial) works well for many safari situations, allowing you to control depth of field through aperture selection while camera automatically adjusts shutter speed for correct exposure. For wildlife portraits where you want to isolate subjects through shallow depth of field, select wide apertures (f/4-f/5.6 on telephoto zoom lenses, wider if you have faster lenses). For environmental shots where you want both foreground and background elements sharp, choose narrower apertures (f/8-f/11).
Shutter priority mode (S or Tv) proves ideal when freezing motion is paramount—you set minimum shutter speed needed to freeze wildlife movement while camera adjusts aperture to maintain proper exposure. For most elephant photography, 1/500 second minimum freezes walking or feeding elephants, while 1/1000-1/2000 second becomes necessary for running elephants, sparring bulls, or bathing action with water splashing. Bird photography often demands even faster speeds—1/1000 second minimum for perched birds, 1/2000-1/4000 second for birds in flight.
Manual mode provides complete control over all exposure parameters, ideal when lighting remains consistent and you want to lock exposure preventing camera from adjusting between frames. Manual mode works well during golden hour when light quality remains consistent, or when shooting in challenging situations where camera's metering might be fooled (extremely bright or dark backgrounds). However, manual requires more photographer attention managing exposure as lighting changes, potentially causing you to miss fleeting wildlife moments while adjusting settings.
ISO Strategy
Modern cameras handle higher ISO settings remarkably well, allowing you to prioritize fast shutter speeds for freezing wildlife motion without worrying excessively about image noise. During bright midday conditions, base ISO (100-200) provides cleanest images with maximum dynamic range. As light levels drop during early morning or late afternoon, increase ISO aggressively to maintain shutter speeds fast enough to freeze motion—don't hesitate to use ISO 1600-3200 or even higher if necessary.
Better a sharp image with some noise than a blurry image at low ISO. Modern noise reduction in post-processing handles even ISO 6400-12800 remarkably well, while no software fixes motion blur from insufficient shutter speed. Set your camera's auto-ISO function with minimum shutter speed (1/500-1/1000 second depending on your lens focal length and image stabilization capability) and maximum ISO (3200-6400 depending on your camera's noise performance), allowing camera to automatically raise ISO as needed maintaining your specified shutter speed.
Autofocus Configuration
Continuous autofocus mode (AI Servo on Canon, AF-C on Nikon/Sony) tracks moving subjects maintaining focus as they move toward or away from camera—essential for wildlife photography where subjects rarely remain stationary. Single-shot autofocus locks focus at one distance and doesn't adjust, causing focus to drift as subjects move resulting in soft images.
Configure focus point selection appropriately for your shooting situation. Single-point AF provides maximum precision allowing you to specify exactly where focus should be—ideal for stationary or predictable subjects where you want specific element (typically the eye) tack-sharp. Zone or area AF spreads focus detection across multiple points giving camera flexibility to track subjects moving within frame—useful for erratic movement like birds in flight or playful elephant calves.
Modern cameras offer increasingly sophisticated subject detection and tracking using artificial intelligence to recognize and follow animals, birds, or even specific features like eyes. Enable these features if your camera offers them—they dramatically improve focus success rates with moving subjects.
Always focus on the subject's eye when photographing animals—images where eyes are sharp appear focused and engaging even if other elements show slight softness, while images where eyes are soft appear unfocused regardless of sharpness elsewhere. If photographing groups, focus on the nearest eye of the nearest animal to you.

Metering and Exposure Compensation
Evaluative/matrix metering (camera analyzes entire frame when determining exposure) works well for most safari situations providing balanced exposures. However, certain scenarios require exposure compensation overriding camera's automatic exposure:
When photographing dark subjects (like water buffalo) against bright backgrounds, camera tends to underexpose the subject trying to prevent bright background from blowing out—dial in +1/2 to +1 stop exposure compensation brightening the subject. Conversely, when photographing light subjects against dark backgrounds, camera may overexpose—dial in negative compensation. When photographing elephants against the bright Kaudulla Tank, you'll frequently need positive compensation ensuring elephant detail isn't lost in shadow.
Histogram review proves more reliable than viewing images on camera screen for assessing exposure, particularly in bright outdoor conditions where screen visibility suffers. Develop habit of checking histograms after initial shots at each location, adjusting exposure compensation if histogram shows clipping in highlights (data pushed against right edge) or shadows (data against left edge).
Drive Mode and Burst Shooting
High-speed continuous shooting (burst mode) captures multiple frames per second, dramatically increasing odds of capturing perfect moments during wildlife behavior sequences. Enable your camera's fastest burst mode and don't be shy about holding shutter button down during interesting action—memory cards are cheap, while missing that perfect moment because you tried to conserve frames is expensive in regret.
Burst shooting proves particularly valuable for elephant interaction sequences (mothers with calves, sparring bulls, bathing rituals), bird flight photography, and any action where split-second timing makes the difference between good and great images. Review burst sequences later, selecting best frames where positioning, expression, and action align perfectly.
Balance burst shooting enthusiasm with storage and battery realities—shooting 10-frame bursts constantly exhausts batteries and memory cards quickly. Use burst mode selectively when action warrants it rather than spraying frames continuously regardless of what's happening.
File Format Considerations
RAW format (CR2 on Canon, NEF on Nikon, ARW on Sony) captures maximum image data providing greatest flexibility in post-processing for adjusting exposure, white balance, color, and recovering shadow/highlight detail. RAW files require processing in software like Adobe Lightroom or Capture One before sharing or printing, adding workflow steps but delivering superior final image quality.
JPEG format produces finished images directly from camera requiring no processing, with smaller file sizes consuming less storage and enabling faster burst shooting as smaller files write to card more quickly. However, JPEGs "bake in" camera's processing decisions (white balance, color profile, contrast, sharpening) making subsequent adjustments more limited and potentially degrading quality.
For serious safari photography where you want maximum post-processing flexibility, shoot RAW. If storage, processing time, or workflow simplicity are priorities and you're confident in getting exposure and color balance correct in camera, JPEG may suffice. Some photographers shoot RAW+JPEG simultaneously capturing both formats, though this doubles storage requirements and slows burst shooting.
Mastering Wildlife Photography Composition
Technical camera settings ensure sharp, properly exposed images, but compositional techniques transform ordinary animal documentation into compelling visual stories that engage viewers and communicate the drama and beauty of wildlife encounters.
The Rule of Thirds and Beyond
Rule of thirds serves as the foundational compositional principle—imagine your frame divided into nine equal sections by two horizontal and two vertical lines, then position your subject along these lines or at their intersections rather than dead-center. This off-center positioning creates more dynamic, visually interesting images with better balance and flow. When photographing elephants, place the animal's eye at an intersection point, with the body extending along one of the lines.
However, rules exist to be broken when situations warrant. Centered compositions work beautifully for symmetrical subjects, when you want to emphasize size and power through formal frontal portraits, or when environmental elements naturally lead viewer's eye to center. Don't become so fixated on rules that you miss great compositions that violate them.
Negative space—empty areas around your subject—can be powerful compositional element when used intentionally. Leaving space in the direction an elephant is walking or looking creates sense of movement and destination, while tight crops eliminating negative space emphasize power and presence through filling the frame completely with subject.
Leading Lines and Natural Frames
Leading lines—roads, water edges, tree lines, or other linear elements—guide viewer's eye through the image toward your subject. Position yourself so these lines lead into your frame from corners or edges, drawing attention naturally to the elephant or other wildlife you're photographing. The shoreline of Kaudulla Tank creates excellent leading lines, as do safari tracks curving through grassland.
Natural frames—foreground elements like overhanging tree branches, grass clumps, or other vegetation—add depth and context while focusing attention on your subject. Shoot through these elements creating a frame-within-frame effect. However, ensure these frames don't become distracting clutter or obscure important subject details like eyes.
Perspective and Angle
Eye-level perspective with your camera at approximately the same height as your subject's eyes creates more intimate, engaging portraits than shooting down from above (which can appear condescending or make subjects look smaller and weaker). Safari vehicle height sometimes places you above wildlife creating downward shooting angles—when possible, ask your driver to position vehicle lower or shoot from lower window positions.
Low angles looking up at subjects emphasize power and dominance, dramatic for elephant bull portraits. High angles looking down work well for showing environmental context, such as elephant gatherings spread across the grassland viewed from elevated positions.
Get closer when safely possible rather than relying entirely on telephoto magnification from distance. Filling more of your frame with subject (while maintaining ethical distances) creates more impactful images. However, this must absolutely never compromise wildlife welfare or your safety—zoom lens magnification exists precisely to bridge this gap safely.

Including Environmental Context
Environmental portraits showing wildlife in habitat context tell richer stories than tight portraits isolating subjects against blurred backgrounds. Include the Kaudulla Tank, surrounding grasslands, distinctive trees, or other elephants in your composition providing sense of place and scale. These images communicate not just what the animal looks like, but where and how it lives.
Balance environmental context with maintaining clear visual hierarchy—your primary subject should still dominate the composition and draw viewer's eye first. Avoid cluttered backgrounds that compete with your subject for attention. Sometimes selective focus (wide aperture creating shallow depth of field) allows including environmental elements while keeping them soft enough not to distract from your sharp, in-focus subject.
Capturing Behavior and Interaction
Behavioral photography showing animals interacting, feeding, bathing, or engaging in social behaviors creates more compelling images than static portraits of animals simply standing. Anticipate action by watching elephant body language—when a bull raises his trunk and shakes his head, he may be about to charge or make a dominance display. When calves start playing together, stick with the scene as action will likely continue.
Sequence shooting capturing multiple frames showing progression of behavior tells visual stories impossible in single images. Mother elephant helping calf cross obstacles, bulls sparring through multiple positions, birds taking flight—these sequences become powerful when presented together.
Eye contact and expression makes animal portraits emotionally resonant. When an elephant looks directly at camera, viewers feel connection and engagement. However, don't obsess over eye contact—many powerful wildlife images show subjects engaged in natural behaviors rather than posing for camera.
Lighting Strategies for Dramatic Wildlife Images
Light quality and direction fundamentally shapes the mood, color, and visual impact of wildlife photographs, making understanding and leveraging lighting one of the most important skills for safari photography.
Golden Hour Magic
Golden hour—approximately the first hour after sunrise and last hour before sunset—provides the most beautiful natural light for wildlife photography. The sun's low angle creates warm, golden color tones that bathe everything in gorgeous light, while directional illumination creates modeling that reveals texture and three-dimensional form. Shadows remain relatively soft rather than harsh black holes, and overall light quality creates images that simply cannot be replicated at other times of day.
Schedule your safaris to maximize golden hour shooting. Morning safaris (6:00 AM start) capture dawn golden hour as prime shooting time, while afternoon safaris (3:00 PM start) build toward golden hour in their final 90 minutes. If choosing between morning and afternoon based solely on light quality, afternoon golden hour often delivers more dramatic color and longer duration of optimal light.
Backlit situations during golden hour create stunning silhouettes when exposing for bright sky, or dramatic rim-lighting when exposing for subject with bright highlights outlining the elephant's form against darker background. Experiment with both approaches—silhouettes emphasize shape and form, while rim-lit subjects maintain detail while still showing golden hour glow.
Managing Harsh Midday Light
Midday light (10:00 AM - 3:00 PM) creates challenging photography conditions with harsh shadows, extreme contrast between highlights and shadows, and unflattering overhead illumination. However, you can still capture good images by adapting your approach:
Look for subjects in shade where light is softer and more even. Elephants often rest under trees during midday heat, providing opportunity for portraits in better light than open areas. Overexposed white skies become less problematic when you crop tighter excluding sky from composition and focusing on subject.
Consider black and white conversion in post-processing for midday images—the high contrast that causes problems in color becomes an asset in black and white, creating dramatic tonal range and emphasizing form and texture over color.
If midday photography is unavoidable (perhaps on full-day safaris), don't waste the time—use it for experimenting with compositions, practicing tracking moving subjects, or simply observing elephant behavior that will inform your shooting when better light returns.
Cloudy Conditions and Diffused Light
Overcast skies during monsoon season or transitional weather create soft, even diffused lighting that works beautifully for certain subjects and approaches. The lack of harsh shadows makes detail visible across entire tonal range without blown highlights or blocked shadows, while the soft light flatters subjects creating gentle, subdued mood.
Cloudy conditions work particularly well for bird photography where the even light allows capturing detail in plumage without extreme highlights. Environmental portraits showing Kaudulla's landscape benefit from dramatic storm clouds adding visual interest to skies. However, the flat light can create somewhat lifeless images lacking the drama and warmth of golden hour—compensate through composition and capturing compelling behaviors that provide visual interest independent of lighting drama.

Specialized Photography Techniques
Beyond fundamental camera settings and composition, certain specialized approaches expand your creative toolkit and allow capturing unique images that stand out from typical safari photography.
Bird Photography Specific Techniques
Photographing Kaudulla's 160+ bird species requires some specialized approaches beyond elephant photography. Birds are generally smaller, faster, and more skittish than large mammals, demanding:
Faster shutter speeds (1/1000 second minimum for perched birds, 1/2000-1/4000 second for flight) to freeze wing movement and prevent blur. Continuous autofocus with subject tracking helps maintain focus on erratic moving targets. Burst mode captures multiple frames increasing odds of perfect wing positions and head angles during flight sequences.
Pre-focus on predicted locations where birds will likely land—exposed branches over water for kingfishers, shoreline areas where storks and pelicans congregate. When a bird arrives, you're already focused at correct distance needing only minor adjustment rather than hunting for focus from scratch.
Include habitat context showing birds in their environment rather than just tight portraits—kingfisher on branch over water, painted storks nesting in lakeside trees, eagles soaring against Kaudulla's dramatic skies.
Silhouette Photography
Silhouettes reduce subjects to pure shape against bright backgrounds, creating graphic, dramatic images emphasizing form. Silhouettes work beautifully during sunrise and sunset when bright sky provides backlight:
Expose for the bright sky using spot metering or reducing exposure compensation -1 to -2 stops, rendering the foreground elephant as dark silhouette. Shoot elephant profiles showing distinctive shape including trunk, ears, and tusks (if present) for most recognizable silhouettes. Multiple elephants creating overlapping silhouettes tell stories of family groups and social bonds.
Silhouettes work particularly well when elephants are positioned on ridgelines or elevated ground against open sky, or along Kaudulla Tank shoreline at sunset with water reflecting colorful sky as background.
Panning for Motion Blur
Panning involves tracking moving subjects with your camera while using slower shutter speeds, creating images where subject remains relatively sharp while background blurs into streaks showing motion. This technique requires practice but produces striking results conveying movement and speed:
Use shutter speeds around 1/30 to 1/125 second—slow enough to blur background but fast enough to maintain some subject sharpness. Follow running elephant smoothly through viewfinder, pressing shutter while continuing smooth tracking motion. The key is smooth, consistent movement matching subject's speed and direction.
Expect high failure rates while learning panning—it's a challenging technique requiring practice. However, successful pans create unique images that stand out from static safari photography.
Creative Use of Depth of Field
Depth of field—the zone of acceptable sharpness in your image—can be manipulated for creative effect. Wide apertures (f/2.8-f/5.6) create shallow depth of field, isolating subjects through sharp focus while blurring distracting backgrounds into soft bokeh. This works beautifully for elephant portraits where you want all attention on the subject without environmental distractions.
Narrower apertures (f/8-f/16) create deeper depth of field, keeping both foreground and background elements sharp—useful for environmental portraits showing landscape context, or when photographing elephant groups where you want multiple animals sharp across different distances.
Experiment with selective focus techniques like focusing on nearest elephant in a group while others blur into background, creating visual depth and hierarchy even within shallow depth of field constraints.
Ethical Wildlife Photography Practices
Ethical considerations must always take precedence over getting any specific photograph—no image justifies disturbing wildlife, causing stress, or compromising animal welfare or your personal safety.
Maintaining Appropriate Distance
Never ask your driver to approach wildlife too closely to get better shots. Respect safe distances that your guides recommend based on their understanding of animal behavior and comfort zones. Telephoto lenses exist precisely to bridge the gap between ethical distances and tight framing—use your lens's magnification rather than physical proximity.
Particularly sensitive situations include elephants with very young calves (mothers are highly protective), male elephants in musth (a hormonal condition causing aggression), and any wildlife showing signs of stress or agitation. If animals are flapping ears, shaking heads, or demonstrating other warning behaviors, you're too close—back off immediately regardless of photographic opportunities being missed.
Never Disturbing Natural Behavior
Avoid making loud noises, sudden movements, or otherwise behaving in ways that might disturb wildlife. Your goal is documentary photography capturing animals as they naturally behave, not provoking reactions or altered behaviors for more dramatic images.
Never throw objects, make loud calls, or use attractants attempting to get animal's attention or make them look at camera. These tactics constitute harassment that stresses wildlife and creates artificial behaviors rather than documenting natural life.
No flash photography ever when photographing elephants or other wildlife. Flash can startle animals, temporarily blind them affecting their navigation and coordination, and potentially provoke aggressive defensive reactions. Modern cameras handle low light excellently through high ISO performance—use these capabilities rather than flash.
Respecting Park Regulations
Follow all park rules and guide instructions without exception. These regulations exist based on years of experience managing wildlife tourism while protecting animals and visitors. Guides know Kaudulla's elephants individually, understand their temperaments and tolerance levels, and can read subtle behavioral cues indicating comfort or stress.
Remain inside safari vehicles at all times unless guides explicitly indicate specific locations where it's safe to exit for bathroom breaks or designated viewpoints far from any animals. The temptation to step out for a better angle or slightly different perspective can have fatal consequences if wildlife reacts defensively to perceived threats.

Sharing Responsibly
When sharing safari images through social media or photo websites, avoid revealing specific wildlife locations with unnecessary precision that might enable unethical visitors to harass animals. General references to "Kaudulla National Park" provide adequate context without pinpointing exact locations of specific elephants or nests.
Include educational captions when sharing images, explaining elephant behavior you observed, conservation challenges facing these animals, or encouraging others to visit responsibly. Use your photography's reach to build support for wildlife conservation rather than just generating likes and comments.
Post-Processing Workflow for Safari Images
Post-processing in software like Adobe Lightroom or Capture One allows you to enhance RAW images, correcting exposure and color issues while emphasizing the drama and beauty you witnessed during your safari.
Initial Organization and Culling
Import images to your computer as soon as possible after safaris, backing up to external hard drive or cloud storage—losing an entire safari's images to memory card failure or computer problems is heartbreaking. Organize by date and location making images easy to find later.
Cull ruthlessly deleting obvious mistakes (severe blur, closed eyes, terrible composition), duplicate frames from burst sequences keeping only the best 2-3 from each sequence, and images that simply aren't strong enough to warrant processing time. Expect to delete 70-80% of what you shot—this is normal in wildlife photography where many variables beyond your control affect success rates.
Basic Exposure and Color Correction
Adjust exposure brightening underexposed images or darkening overexposed ones. Use Lightroom's highlight and shadow sliders recovering detail in blown highlights or blocked shadows. Adjust white balance correcting color casts—safari golden hour images sometimes appear too orange, while images shot in shade can be too blue.
Enhance contrast bringing flat images to life, but avoid excessive contrast creating harsh transitions. Adjust clarity (midtone contrast) emphasizing texture and detail in elephant skin or landscape elements. Increase vibrance (saturating muted colors while protecting skin tones) rather than saturation (which oversaturates everything uniformly creating unnatural results).
Targeted Adjustments
Use graduated filters in Lightroom to selectively adjust sky exposure and color without affecting your subject. Radial filters or adjustment brushes allow brightening subjects selectively, enhancing eye detail and sharpness, or darkening distracting background elements drawing attention away from main subjects.
Dodge and burn (selectively lightening and darkening areas) enhances three-dimensional form and draws attention to important elements. Lighten elephant eyes slightly to make them catch viewer's attention, darken busy backgrounds slightly to reduce their visual weight.
Sharpening and Noise Reduction
Apply sharpening enhancing detail and perceived sharpness, but avoid over-sharpening creating ugly halos and artifacts. Use Lightroom's masking slider ensuring sharpening applies only to detail-rich areas (like elephant skin texture) rather than smooth areas (like out-of-focus backgrounds) where it emphasizes noise and imperfections.
Apply noise reduction to high-ISO images removing the grainy appearance of digital noise, but preserve enough texture to maintain natural appearance—excessive noise reduction creates plasticky, detail-less results worse than moderate noise.
Final Touches
Crop images improving composition, removing distracting edge elements, or correcting slightly off composition from original capture. However, avoid excessive cropping that significantly reduces resolution—one advantage of high-megapixel cameras is cropping flexibility, but even 45-megapixel files become small when cropped to 25% of original size.
Export final images in appropriate formats—full-resolution JPEGs for printing or professional use, web-optimized smaller JPEGs (1920px long edge) for sharing online. Add copyright watermarks protecting your work, though keep these subtle and in corners rather than obtrusive overlays ruining the images.
The combination of technical camera mastery, compositional artistry, ethical practices, and skilled post-processing transforms your Kaudulla safari from simply pointing a camera at elephants into creating powerful wildlife images that tell compelling visual stories, honor the magnificent creatures you encountered, and potentially inspire others to care about conservation of these endangered Asian elephants and their fragile habitats. Every image you capture documents not just an animal, but a moment in the ongoing story of wild elephants in Sri Lanka—a story that deserves to be told beautifully, truthfully, and with the respect these remarkable animals command.